Installing Python and Pip on Windows
In this tutorial you’ll learn how to set up Python and the Pip package manager on Windows 10, completely from scratch.
Step 1: Download the Python Installer
The best way to install Python on Windows is by downloading the official Python installer from the Python website at python.org.
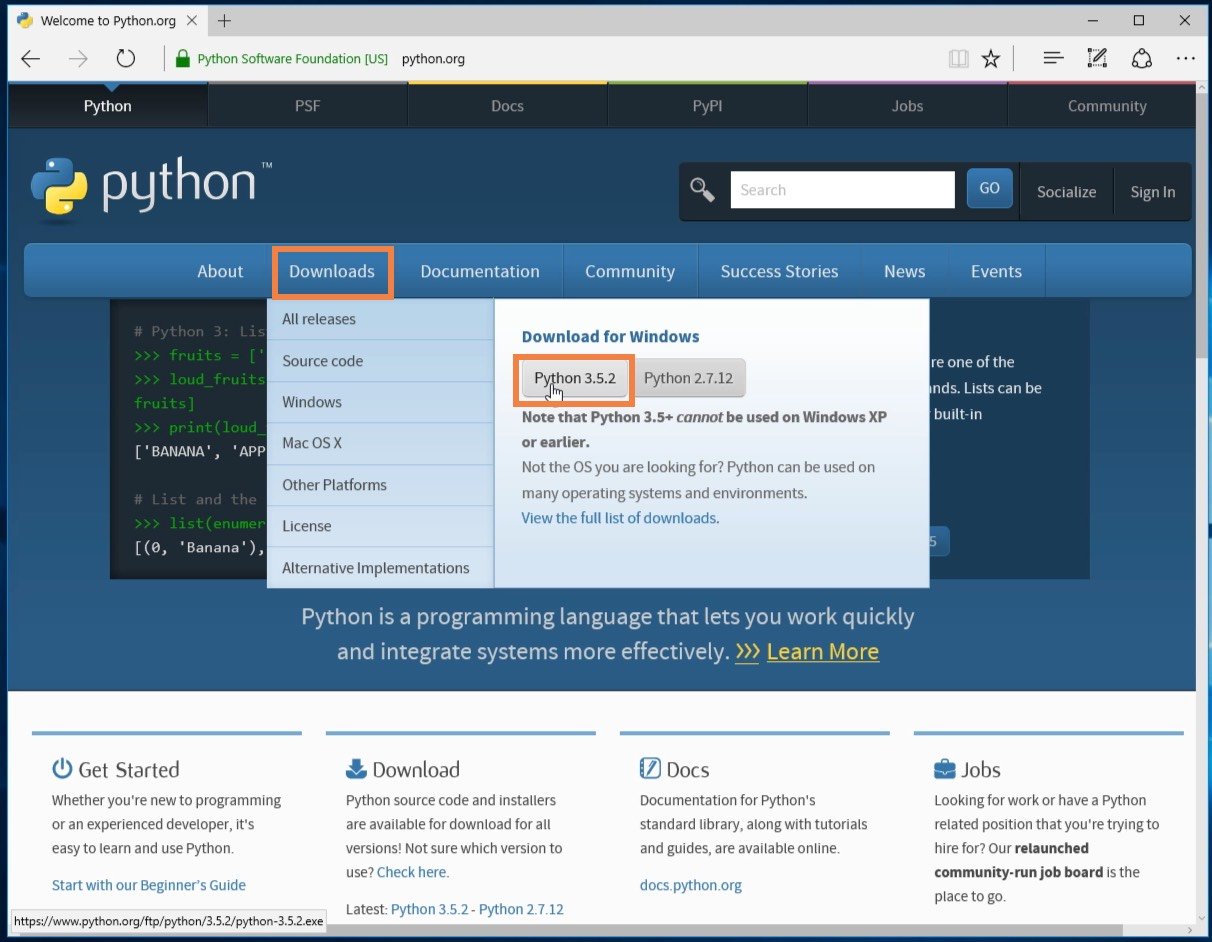
To do so, open a browser and navigate to https://python.org/. After the page has finished loading, click Downloads.
- The website should detect that you’re on Windows and offer you to download the latest version of Python 3 or Python 2. If you don’t know which version of Python to use then I recommend Python 3. If you know you’ll need to work with legacy Python 2 code only then should you pick Python 2.
Under Downloads → Download for Windows, click the “Python 3.X.X” (or “Python 2.X.X”) button to begin downloading the installer.
Sidebar: 64-bit Python vs 32-bit Python
If you’re wondering whether you should use a 32-bit or a 64-bit version of Python then you might want to go with the 32-bit version.
It’s sometimes still problematic to find binary extensions for 64-bit Python on Windows, which means that some third-party modules might not install correctly with a 64-bit version of Python.
My thinking is that it’s best to go with the version currently recommended on python.org. If you click the Python 3 or Python 2 button under “Download for Windows” you’ll get just that.
Remember that if you get this choice wrong and you’d like to switch to another version of Python you can just uninstall Python and then re-install it by downloading another installer from python.org.
Step 2: Run the Python Installer
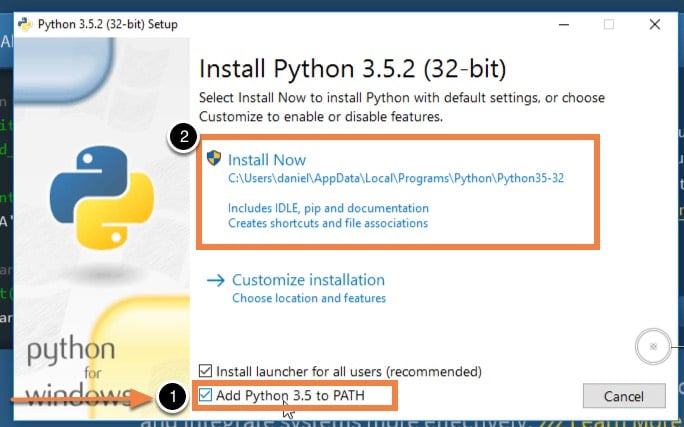
Once the Python installer file has finished downloading, launch it by double-clicking on it in order to begin the installation.
Be sure to select the Add Python X.Y to PATH checkbox in the setup wizard.
- Please make sure the “Add Python X.Y to PATH” checkbox was enabled in the installer because otherwise you will have problems accessing your Python installation from the command line. If you accidentally installed Python without checking the box, follow this tutorial to add
python.exeto your system PATH.
Click Install Now to begin the installation process. The installation should finish quickly and then Python will be ready to go on your system. We’re going to make sure everything was set up correctly in the next step.
Step 3: Verify Python Was Installed Correctly
After the Python installer finished its work Python should be installed on your system. Let’s make sure everything went correctly by testing if Python can be accessed from the Windows Command Prompt:
- Open the Windows Command Prompt by launching cmd.exe
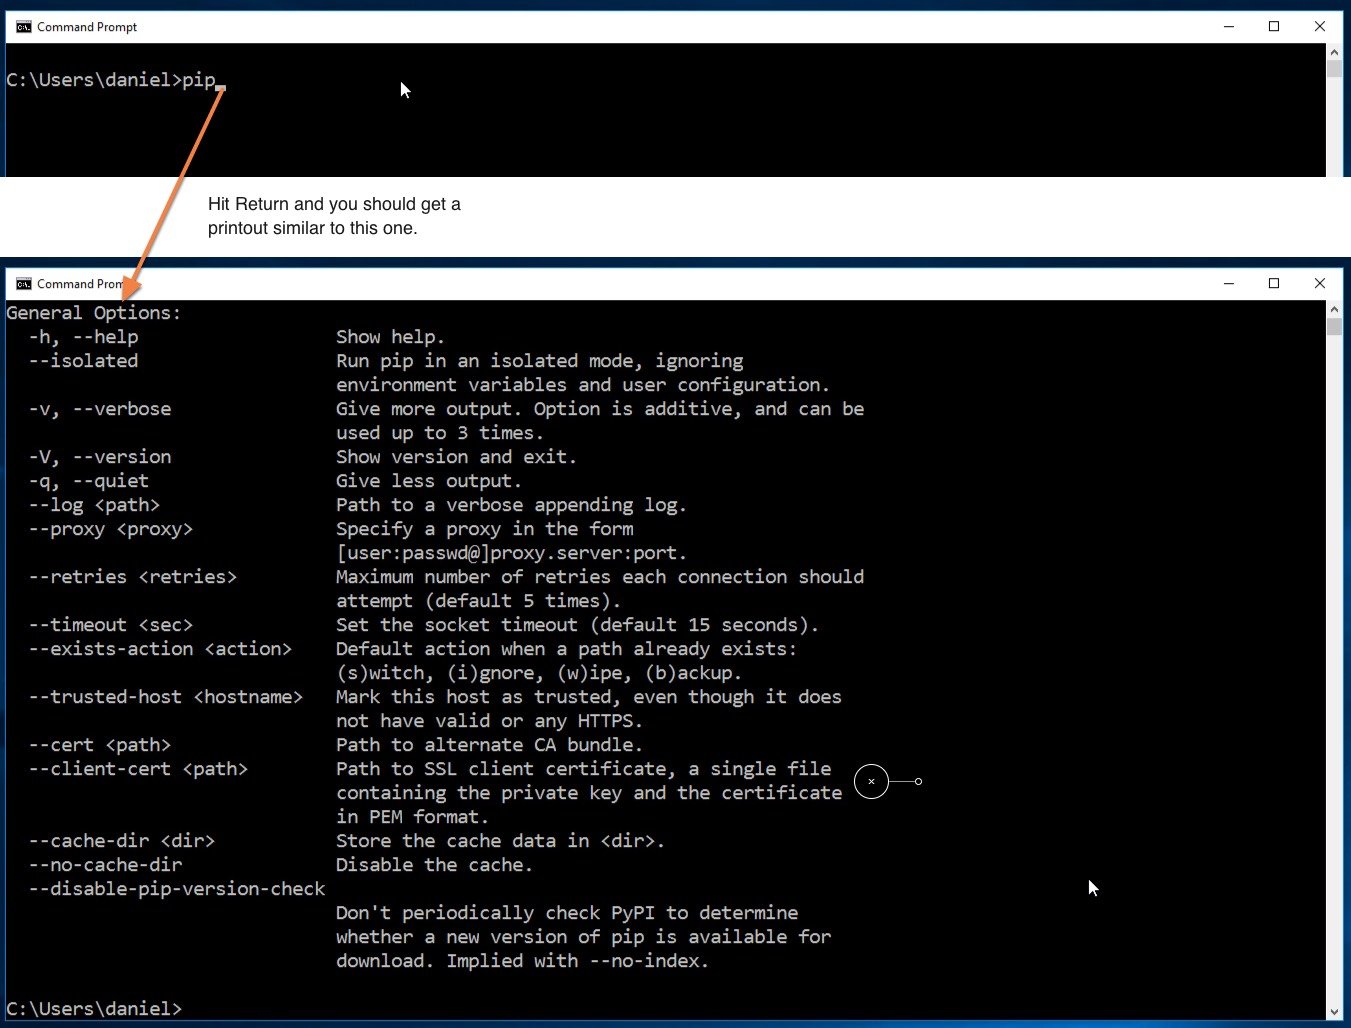
- Type pip and hit Return
- You should see the help text from Python’s “pip” package manager. If you get an error message running pip go through the Python install steps again to make sure you have a working Python installation. Most issues you will encounter here will have something to do with the PATH not being set correctly. Re-installing and making sure that the “Add Python to PATH” option is enabled in the installer should resolve this.
What Now?
Assuming everything went well and you saw the output from Pip in your command prompt window—Congratulations, you just installed Python on your system!
Wondering where to go from here? Click here to get some pointers for Python beginners.

