Let’s Program with Python: Statements, Variables, and Loops (Part 1)
In this four-part introduction for new programmers you’ll learn the basics of programming with Python using step-by-step descriptions and graphical examples.
In this guest post series by Doug Farrell you’ll learn the basics of programming with Python from scratch. If you’ve never programmed before or need a fun little class to work through with your kids, you’re welcome to follow along.
Looking for the rest of the “Let’s Program with Python” series? Here you go:
- Part 1: Statements, Variables, and Loops (This article)
- Part 2: Functions and Lists
- Part 3: Conditionals and “if” Statements
- Part 4: Reacting to User Input
Table of Contents – Part 1
What is Python?
Since you’re reading this I’m hoping you’re interested in learning how to program in Python.
Python is a programming language, which means it’a a language both people and computers can understand. A computer language is a formal subset of an natural language, like English. A computer language lets people express what they want a computer to do, and tells a computer how to do it.
A computer program is a set of instructions written in a particular computer language. There are lots of different computer languages in the world, most were created to solve certain kinds of problems in different ways, and most over lap in the kinds of things they can do.
Python was developed by a Dutch software engineer named Guido van Rossum, who created the language to solve some problems he saw in computer languages of the time.
Python draws from a lot of good ideas in other languages and pulls them together in one place. Python is a pretty easy computer language to learn, and yet is very powerful. The name Python comes from Guido’s favorite comedy group, Monty Python’s Flying Circus.
This course uses Python 3.6.1, but the examples should work with any version of Python 3 and greater.
Natural Language vs. Formal Language
English is a natural language that’s evolved over time to help us talk with each other. It has a big vocabulary, lots of multiple meanings and depends a lot on how it’s used to make the meaning clear.
Natural languages work well for people because we fill in the gaps where needed. This kind of language fails completely for computers because they need exact instructions in order to run. Formal languages (all programming languages) have limited vocabularies and almost no multiple meanings.
Let’s take an English example that’s something like a “program” for a person, how to make scrambled eggs:
1. Place a frying pan on the stove burner
2. Turn the burner to medium
3. Melt butter in the pan
4. Crack two eggs into pan
5. Stir the eggs to cook and scramble them
6. When finished, serve the eggs on a plate
If the steps above are followed in order, someone should be able to make scrambled eggs. This simple set of steps describe how to perform a task. A computer program is very much the same, a set of steps telling a computer how to perform a task.
Elements of Programming
As you learn to program you’ll find you need to do certain things to make the program do what you want: how to make the computer do something, remember things, doing things over and over and make decisions. Almost all programming languages provide ways to do these four basic things, and they’re known as:
- Statements: the things a program can do, like performing calculations, drawing on the screen, etc.
- Variables: these are the “things” (information) you want your program to work on and remember
- Loops: doing things over and over again very quickly
- Conditionals: these are choices a program can make about what to do, this is what makes programs “appear” smart.
We’ll make use of these four things as we go along.
Enough of That, Let’s Write Some Python!
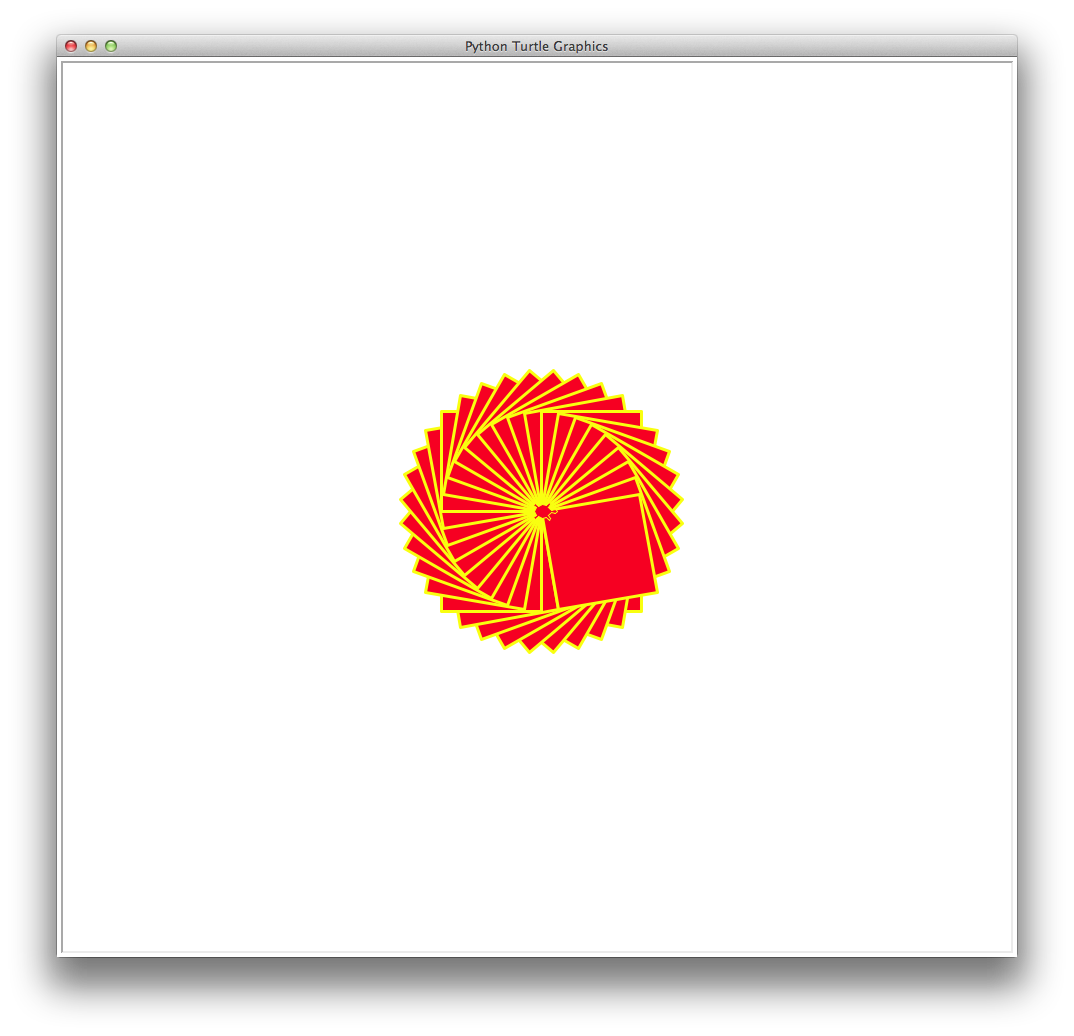
Our goal is to create a Python program that will draw an image on our computer screen. The image we’re going to create looks something like a flower, and we’re going to learn how to use Python to create it. The end results will look like this:
So how do we create a Python program? There are two ways to work with Python; working with it directly, and creating Python program files.
This is where we can use the tool called Idle. Idle is a program that lets you both work with Python directly and create Python program files.
So let’s start Idle. When you installed Python you should also have gotten the Idle program installed, if so, let’s start it up!
Starting Idle should give you a window that looks something like this:
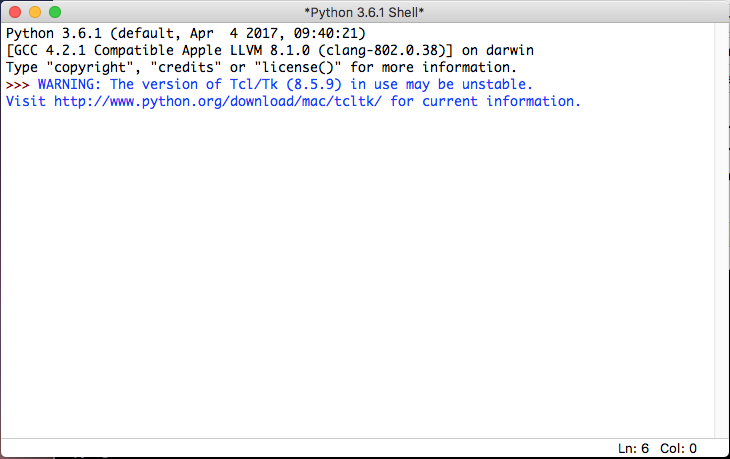
This window provides a Python command prompt (hit return a couple of times if you don’t see it) that allows you to run Python statements line by line.
This is called interactive mode as it allows us to ‘interact’ with Python. The command prompt in interactive mode looks like this:
>>>
Its at this prompt where you enter Python statements to try things out.
Statements in Python
Statements are the program commands that make the computer do something in a Python program. Statements can be as simple or as complicated as we’d like to make them.
Here are some examples:
>>> print("Hello there")
Hello there

>>> print(12)
12

>>> 12 * 3
36

>>> 12 / 3
4.0
The above statements print out a welcome string, perform some basic math and Python is responding. What we’ve done above is enter some Python statements at our command prompt, and Python ran them.
Creating Python Program Files
Working with interactive mode, is great for trying things out with Python. However, we want to create a Python program we can run over and over again without having to re-type it every time.
This is where creating a Python program and saving it as a file is very handy. Python program files are just like any other text file, but usually have the extension “.py”.
We can create a Python program file in Idle by clicking the File → New Window menu item. This opens up a new, empty window that is a simple text editor.
You’ll notice there is no >>> Python command prompt in the window. This is because in the file window we’re not interacting with Python directly, we’re creating a Python program file.
Let’s use our new Python program file to create our first Python program.
The “Turtle” Graphics Module
Python comes with a large library of modules that let us do some interesting things, and one of those modules is called turtle.
The turtle module is a nice tool for drawing graphics on the screen. You can find the turtle graphics documentation here.
The turtle module is based on the idea of a “turtle” on the screen that draws a line as it moves around, as if it had a marker taped to it’s shell.
In order to use the turtle module we have to “import” it into our Python program. Importing a module adds the features and capabilities of that module to our Python program.
To import the turtle module add this line to our Python program:
import turtle
Drawing With Turtle
Once the turtle module is available to us we can use it to draw things with a turtle. Enter the following lines into our program:
t = turtle.Turtle()
t.shape("turtle")
t.forward(100)
Saving and Running a Python Program
Once you’ve got this entered, let’s run the program. To do that we have to save the file first, which we can do from the File → Save menu selection.
Give our program a name and save it to a directory on the hard disk where you can find it again.
To run the program select Run → Run Module. If your program runs without any errors (which usually means you have a typo in your program), a window will open up with a turtle shape at the end of a short line.
That window should look something like this:
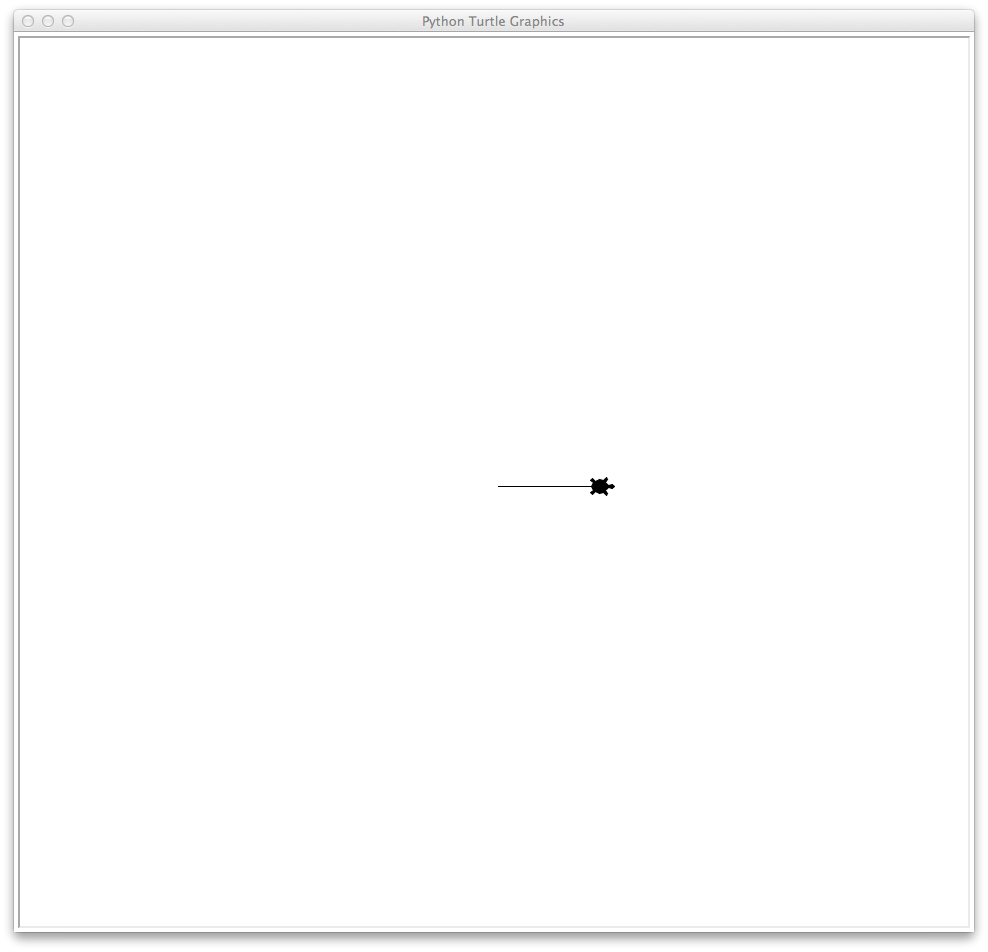
This is what our program told Python to do, use the turtle module to create a turtle we’re calling t, change it’s shape to look like a ‘turtle’ and move it forward 100 pixels.
Our turtle, t, is the first variable we’ve created with Python in our program.
Variables in Python
In Python things like our turtle t are represented by variables. Variables let us give a name to something so you and the program can remember it and use it later.
For instance, here’s a variable assignment:
x = 10
This looks a lot like math, and that’s actually where the idea of assigning variables came from.
This simple Python statement assigns the number 10 to a variable called x. The equal sign (=) in the line above creates the variable x and assigns it a value.
In our program we’ve done this by using the turtle module to create a turtle (the Python statement turtle.Turtle()) and assigned the results, a turtle object, to a variable we called t.
Let’s Get Back to Drawing!
Let’s add some more statements to our program to make it draw some more. Let’s make our Python program look like this:
import turtle

t = turtle.Turtle()
t.shape("turtle")
t.forward(100)
t.right(90)
t.forward(100)
t.right(90)
t.forward(100)
t.right(90)
t.color("red")
t.forward(100)
t.right(90)
When you save and run our program the screen your turtle is drawing on should look like this:
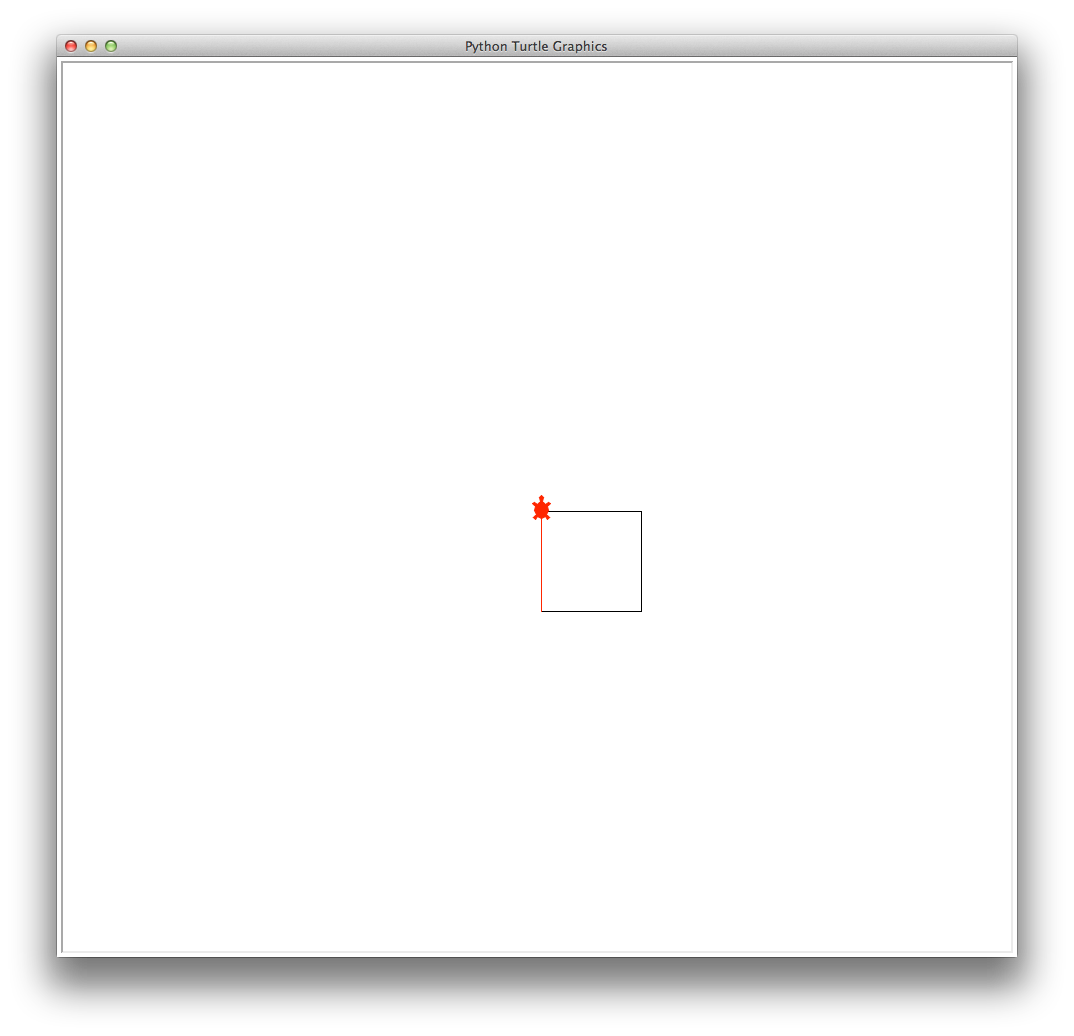
So what’s going on here? What we’ve done is given our turtle a set of commands (Python program statements), and it has run them. Here’s what the statements we entered were doing:
- Line 1: import the turtle module so our program can use it
- Line 3: use the turtle module to create our turtle,
t - Line 4: change the shape of our turtle to look like a turtle
- Line 5: from where the turtle is, move forward 100 pixels
- Line 6: from where the turtle is, turn right 90 degrees, a right angle
- Line 7: from where the turtle is, move forward 100 pixels
- Line 8: from where the turtle is, turn right 90 degrees, a right angle
- Line 9: from where the turtle is, move forward 100 pixels
- Line 10: from where the turtle is, turn right 90 degrees, a right angle
- Line 11: change the color used by the turtle to red
- Line 12: from where the turtle is, move forward 100 pixels
- Line 13: from where the turtle is, turn right 90 degrees, a right angle. This brings our turtle back to its original starting position.
These statements made the turtle draw a box with the last side of the box drawn in red. You can see something interesting about drawing with our turtle; what it draws is based on where it is on the screen and which way it’s headed.
Let’s learn some more Python statements to draw with our turtles.
Turtle Speed: To make our turtle draw faster we use the turtle speed() method. To use this we’ll add this statement to our program:
t.speed(0)
The number 0 between the parenthesises is called a parameter, which is being given to the turtle’s speed() method, making our turtle draw as fast as it can.
Turtle Line Width: We can make our turtle draw with a thicker line, making it easier to see on screen. We do this with the turtle width() method. We can pass a parameter to the width method, expressing a value in pixels. So for example adding this line to our program makes our turtle draw with a line 3 pixels wide:
t.width(3)
Filling-in Shapes: We can also fill a shape (like our box) with color using two other turtle methods, begin_fill() and end_fill(), and by modifying our t.color() method. If we use these Python statements:
t.color("yellow", "red")
t.begin_fill()
# Draw shape
t.end_fill()
We have told our turtle to draw with “yellow” and fill in any shapes with “red”.
Then we use begin_fill() at the start of drawing a closed shape, draw our shape and then used end_fill() to fill that shape with “red”.
The following line is a Python comment:
# Draw shape
I’m using the comment here to indicate where our shape drawing code should go. Comments in Python are used to tell us, the programmers, what’s going on, but are ignored by Python.
Putting It All Together
Taking the things we’ve learned from our box drawing, let’s draw something a little more complicated by drawing a sort of flower.
We’ll do this by doing two things; draw multiple boxes, filling the box with color and turning the turtle slightly between each one using the new turtle methods we just learned about.
To draw our flower we’re going to draw multiple boxes, turning each box slightly every time. One way to do that would be to just repeat our box code over and over like this:
import turtle

t = turtle.Turtle()
t.speed(0)
t.color("yellow", "red")
t.width(3)

# Draw our first filled in box
t.begin_fill()
t.forward(100)
t.right(90)
t.forward(100)
t.right(90)
t.forward(100)
t.right(90)
t.forward(100)
t.right(90)
t.end_fill()

t.right(10)

# Draw our second filled in box
t.begin_fill()
t.forward(100)
t.right(90)
t.forward(100)
t.right(90)
t.forward(100)
t.right(90)
t.forward(100)
t.right(90)
t.end_fill()

t.right(10)

# Keep going till you've drawn your flower
This would work fine, but we would have to repeat these statements for as many petals as we want to give our flower.
One thing you should know about being a programmer is we’re very lazy and don’t like to repeat ourselves if we don’t have to.
Can Python help us not repeat ourselves? Yes, it can by letting us use a loop to repeat drawing the box multiple times.
Loops in Python
One of the elements of programming mentioned earlier is being able to create loops. Loops are statements in a programming language that allows us to repeat a set of program statements over and over in a controlled way. In our program we’d like to repeat the statements:
t.begin_fill()
t.forward(100)
t.right(90)
t.forward(100)
t.right(90)
t.forward(100)
t.right(90)
t.forward(100)
t.right(90)
t.end_fill()
t.right(10)
This set of statements creates our outlined and filled in box. We’d like to repeat these statements, with a slight turn of 10 degrees each time, in order to create a flower. Creating a loop lets us do this. One of the looping statements in Python is called a “for loop”, and it’s used to create a loop that repeats a fixed number of times.
Let’s do a little math to figure out how many times we need to repeat this if we want to make a full circle when our turtle is turning right by 10 degrees after every filled in box.
In case you didn’t know already, there are 360 degrees in a full circle. That means dividing a circle of 360 degrees by 10 degrees gives us a value of 36. This means we want to repeat our box 36 times in order to create our flower.
How can we do this with Python?
The “for” loop: We want to repeat our filled in box 36 times, so we know beforehand how many times we want to loop. This is where the Python for loop comes in handy.
It is made for repeating things a known number of times. It looks like this as a Python definition statement:
for <thing> in <list of things>:
    # Everything we want to do on the loop
What does that mean? That’s a kind of formal presentation of what a for loop should look like in Python. What it means is this:
- Take one <thing> from the <list of things>
- End the for statement with a
:character - All the statements indented under the
forloop should be run every time through the loop. Indentation is very important to Python - Go back to the start of the
forloop, get another <thing> from <list_of_things> - Keep doing this till there are no more things in <list_of_things>
This sounds a lot harder than it actually is. For our program we’ll use a for loop that looks like this:
for petal in range(36):
    t.begin_fill()
    t.forward(100)
    t.right(90)
    t.forward(100)
    t.right(90)
    t.forward(100)
    t.right(90)
    t.forward(100)
    t.right(90)
    t.end_fill()
    t.right(10)
Our box code is in there, under the for loop, but what’s that strange looking range(36) thing at a the end of our for loop where the <list of things> should go?
The range(36) thing is what provides the <list_of_things> from our formal definition of a for loop. Let’s talk about that.
The “range” function: Let’s jump back over to our Idle interactive window for a minute and enter this statement:
>>> range(36)
range(0, 36)
Python responds by running this code and prints out what looks like it just told us about itself. What does this mean?
To Python the range(36) function is going to provide 36 things when used inside a for loop. Each time through the for loop Python will take a value from the range defined (0 to 35) and assign it to a variable, in our case that variable is called petal.
It will continue this until there are no values left in the range. The way we’ve set things up it will loop 36 times, which is what we want. In this case we’re not using the petal variable, but it’s required by Python to create a correct for loop.
To create our flower using a for loop make our program look like this:
import turtle

t = turtle.Turtle()
t.speed(0)
t.color("yellow", "red")
t.width(3)

for petal in range(36):
    t.begin_fill()
    t.forward(100)
    t.right(90)
    t.forward(100)
    t.right(90)
    t.forward(100)
    t.right(90)
    t.forward(100)
    t.right(90)
    t.end_fill()
    t.right(10)
Let’s go through this line by line.
- Line 1: import our turtle module
- Line 3: create our turtle object and use our variable
tto keep track of it - Line 4: set our turtle drawing speed to fast
- Line 5: tell our turtle to draw in “yellow” and fill in shapes with “red”
- Line 6: set our turtle drawing width to 3 pixels
- Line 8: begin our
forloop and tell it to loop 36 times - Line 9-19: draw our box and then turn slightly right 10 degrees.
Notice how lines 9 through 19 are indented under the for loop. This is important as it tells Python all these lines are part of the for loop. In Python the indentation is required to tell the program a set of statements are part of a block like this.
Once you’ve got this entered, save our program and then run it. If your program runs without any syntax errors (which usually means you have a typo in your program), you should get a window like this:
Conclusion
Congratulations, you’ve written your first colorful, interesting Python program! In the next class in this series you’ll learn how to write reusable “code building blocks” with functions: